| БрМЭЦМі: |
| БОЮФРДздгкМђЪщЃЌБОЮФжївЊМђЕЅДюНЈСЫвЛЬзgerritЗўЮёЦїЃЌгУгкбЇЯАgerritЙЄОпЃЌПЩвдИќКУЕФЮЊПЊдДЩчЧјЙБЯзДњТыЁЃ |
|
Gerrit ДњТыЩѓКЫЙЄОпЃЌЗсИЛЕФШЈЯоЙмРэЃЌОпгаЙуЗКЭЈгУадЁЃ
1.вбОДДНЈКУЕФеЪКХгаadmin dev1 dev2 verify1
verify2 review1 review2

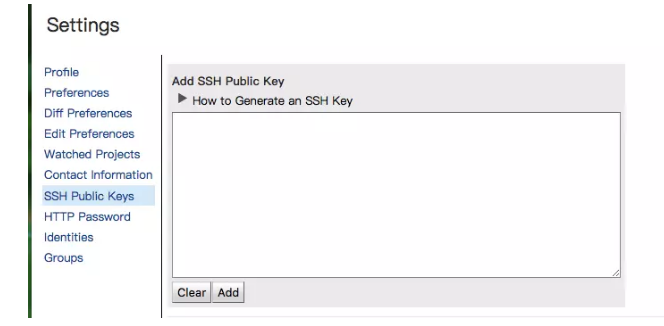
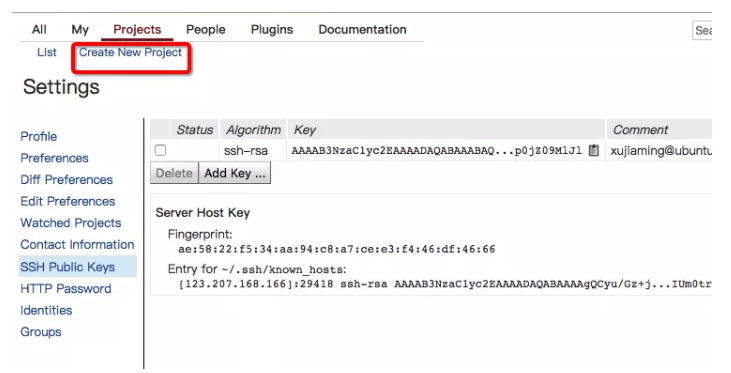
2.ЯШЕЧТМadminЃЌЩшжУSSHаХЯЂ
1ЃЉЕуЛїгвВреЪКХУћГЦЃЌЕуЛїSettings

2ЃЉНЋздМКЕФsshЙЋдПеГЬљНјШЅЃЈssh ПЩвдЭЈЙ§ssh-genkeyЩњГЩЃЉ
3. adminДДНЈЙЄГЬ
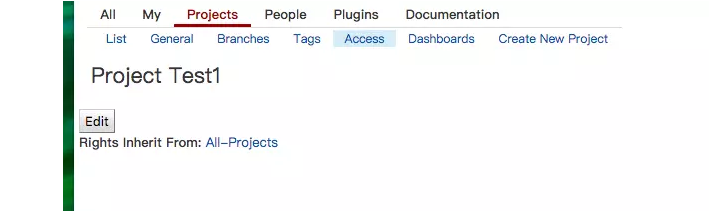
ЕуЛїProjectЃ> Create New Project
ЩшжУЙЄГЬУћГЦЃКTest1
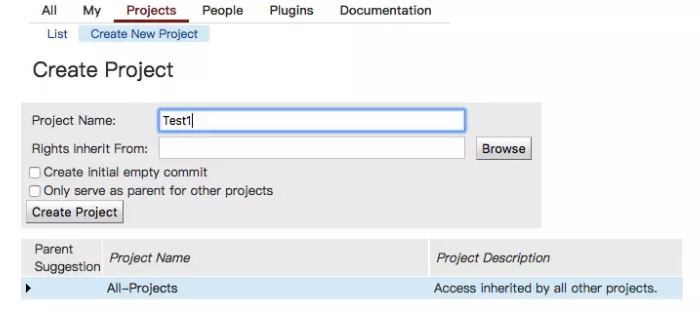
дкProjectЃ>ListжаПЩвдПДЕНздМКЕФДДНЈЙЄГЬ
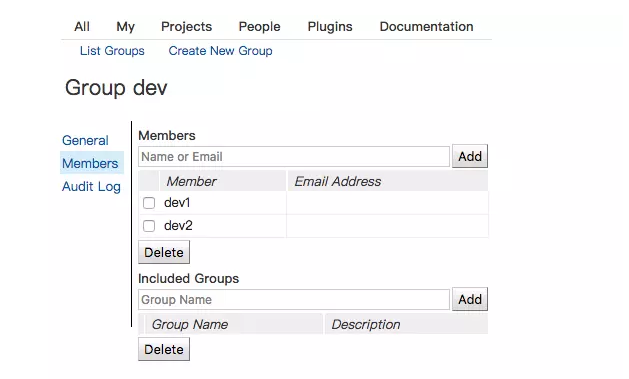
4.ДДНЈгУЛЇзщ dev verify review
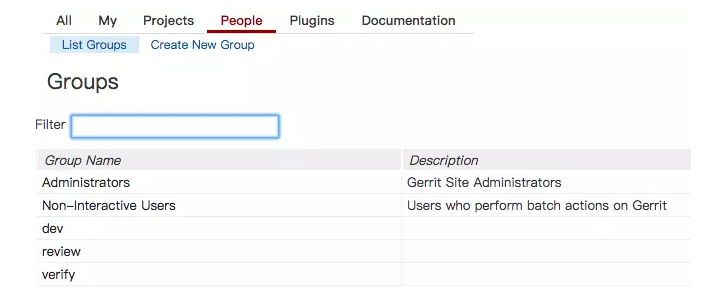
People->Create New GroupЃЌДДНЈШ§ИізщЃЌdevзщгУгкЬсНЛДњТы
ЃЏverify гУгкбщжЄДњТы ЃЏreview зщгУгк code review
ЬэМггУЛЇзщНсЙћШчЯТЃК
5.ШЈЯоЩшжУ
GerritШЈЯоЗжХфЙІФмКмЧПДѓЃЌПЩвдздМКдкAccessЖрЖрГЂЪдЁЃдк
Project->access жаЩшжУШЈЯоЃЌЕуЛїedit
ОпЬхЕФAccessХфжУздМКПЩвдГЂЪдЃЌЦфжаVerify CodeReviewЕФХфжУБШНЯживЊЁЃвЛДЮЭъећЕФСїГЬЃЌашвЊVerifier
CodreReviewerЕФЙВЭЌзїгУВХФмзюжеsubmitДњТы

6.ПЊЗЂзХЬсНЛДњТы
xxx.xxx.xxx.xxxдЦЗўЮёЦНЬЈЕижЗ
| 1ЃЉgit
clone ssh://dev1@xxx.xxx.xxx.xxx:29418/Test1
2ЃЉgitdir=$(git rev-parse --git-dir); scp -p
-P 29418 dev1@xxx.xxx.xxx.xxx:hooks/commit-msg
${gitdir}/hooks/
3ЃЉtouch haha.txt
4) git add haha.txt
5) git commit -m "first"
6) git push origin HEAD:refs/for/master
|
ДЫЪБдкall->openФмЙЛПДЕНвЛДЮаоИФЕФЬсНЛЃЌall->ДњБэвбОКЯВЂЕФЬсНЛЃЌAbandonДњБэОмОјЕФЬсНЛ
ЦфжазДЬЌБъжОCRДњБэcode reviewЧщПіЃЌVДњБэverifyЧщПі

review1гУЛЇ ЕФTest1НчУцЯдЪО

ЕуЛїРЖЩЋАДХЅКѓЃЌcode reviewЭЈЙ§

verify1НчУц

ЕуЛїРЖЩЋАДХЅЃЌVЭЈЙ§

ЕБСНепЭЈЙ§КѓЃЌadminЕФsubmitЙІФмГіЯж
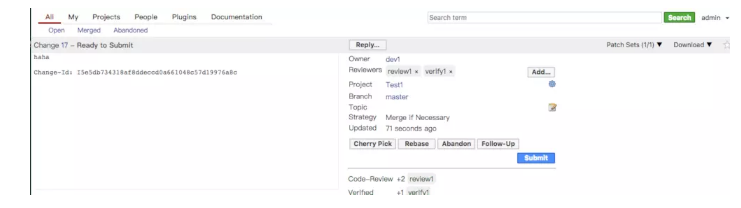
ЕуЛїЭъГЩКѓЃЌall->openПДВЛЕНСЫЃЌall->mergedГіЯжБОДЮЬсНЛМЭТМ

|