| UML软件工程组织 | |||
| |
|||
|
|||
2008-05-12 作者:peter 出处: Huihoo.org
|
| 名称 | 版本号 |
| JDK | 1.4.2_01 or Higher |
| Application Server JFox | 1.2 or Higher |
| Database MySQL | 4.0 or higher |
| Operation System | Windows 2000 Server, XP, Unix, RedHat 2004 |
3.系统安装
3.1 Java安装
1) 从http://java.sun.com/j2se/1.4.2/download.html 安装JDK 1.4.2或更高版本, 在我的电脑à 高级à 环境变量中设置%JAVA_HOME%;
3.2 JFox 安装
1) 从http://sourceforge.net/projects/JFox 下载JFox 最新版本,解压缩到指定目录
2) 在JFox安装目录的bin目录下,运行startup.bat启动JFox
3) 连接http://localhost:8080,可以访问JFox的Web界面,在这里可以执行JFox提供的例子
4) 连接 http://localhost:8082,可以看到正在运行的系统组件,并可以进行管理
3.3安装MySQL
1) 从http://dev.mysql.com/downloads/下载MySQL 4.0,解压缩并运行安装程序
2) 从http://dev.mysql.com/downloads/other/mysqlcc.html下载MySQL Control Center ,解压缩并运行安装程序
3) 启动MySQL, 并运行MySQL Control Center
4.JPetStore应用部署
4.1 JPetStore部署
1) 从http://sourceforge.net/projects/ibatisjpetstore/ 下载JPetStore 4.0, 解压缩到指定目录, JPetStore目录结构如下
Code:
| JPetStore
/build /ddl /devlib /doc /lib /src /web |
2) 从http://dev.mysql.com/downloads/connector/j/3.0.html 下载MySQL JDBC Driver mysql-connector-java-3.0.15-ga.zip ,解压缩并将mysql-connector-java-3.0.15-ga-bin.jar拷贝到上述JPetStore的lib目录下
3) 修改上述JPetStore的src/properties/database.properties文件
driver=com.mysql.jdbc.Driver
url=jdbc:mysql://localhost:3306/jpetstore
username=jpetstore
password=jpetstore
4) 重新构建JPetStore, 在build目录下运行build.bat, 将会在build/wars/生成jpetstore.war
5) 安装数据库脚本,在ddl\mysql目录下可以找到
jpetstore-mysql-schema.sql
jpetstore-mysql-dataload.sql
jpetstore-mysql-create-user.sql
在MySQL Control Center SQL窗口中依次执行
5) 在MySQL CC中创建用户jpetstore,并设置密码为jpetstore ,并赋予jpetstore用户所有访问jpetstore schema的权限。
6) 将jpetstore.war拷贝到JFox安装目录的deploy目录下
4.2运行JPetStore
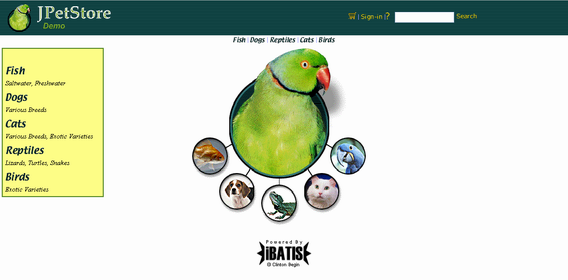
启动JFox, 在浏览器中地址栏中键入http://localhost:8080/jpetstore
您就可以看到如下的页面

运行在JFox 上的JPetStore在线演示可以从http://www.jfox.cn/jpetstore 访问到
期待有更多的成功应用被移植到JFox上,如果你有成功的案例,请分享给我们
请发送电子邮件到: jfox-developers@lists.sourceforge.net
参考
1. http://www.huihoo.org/jfox
2. http://prdownloads.sourceforge.net/ibatisjpetstore/JPetStore-1-2-0.pdf?download
3. http://www.ibatis.com/jpetstore/DevDays.pdf
组织简介 | 联系我们 | Copyright 2002 ® UML软件工程组织 京ICP备10020922号 京公海网安备110108001071号 |