| БрМЭЦМі: |
|
БОЮФжївЊНщЩмAPPЕФбЙВтЪЕМљЃЌMonkeyИпМЖВЮЪ§ЕФгІгУЃЌMonkey
ScriptГЃгУУќСюНщЩмЃЌMonkeyScriptЪЕеНЕШФкШнЁЃЁЃ
БОЮФРДздгкВЉПЭдАЃЌгЩЛ№СњЙћШэМўAliceБрМЁЂЭЦМіЁЃ |
|
зМБИВтЪдЛЗОГ
зМБИAndroid SDKЛЗОГ ЯТди AndroidSDK
зМБИpythonЛЗОГ ЯТди python
APPЕФбЙВтЪЕМљвЛ
бЙВтЙ§ГЬstep1ЃКЪжЛњЕїЪдЕНПЊЗЂепбЁЯюЃЌНЋUSBЕїЪдбЁЩЯЁЃЃЈЁОЩшжУЁП-ЁОЙигкЪжЛњЁП-ЁОЕуЛїАцБОКХ5/6ДЮЁПНјШыПЊЗЂепбЁЯюЃЌЕуЛїЁОПЊЗЂШЫдБбЁЯюЁП-ЁОЙДбЁUSBЕїЪдЁПЃЉ
бЙВтЙ§ГЬstep2ЃКШЗШЯЪжЛњКЭЕчФдвбОГЩЙІСЌНгЃЌШЗШЯСЌНгУќСюЃКadb devices
бЙВтЙ§ГЬstep3ЃКАВзАВтЪдAPP УќСюаа adb install package.apk
бЙВтЙ§ГЬstep4ЃКЗЂЫЭбЙСІжИСюЃКadb shell monkey 1000
бЙВтЙ§ГЬsetp5ЃКЛёШЁappАќУћ adb logcat | grep START
cmp=АќУћ/ ФЇОЕАќУћЃКcom.cmiot.magicmirror
бЙВтЙ§ГЬstep6ЃКИјжИЖЈАќДђбЙСІ
adb shell monkey -p package 1000
MonkeyИпМЖВЮЪ§ЕФгІгУ
1.throttleВЮЪ§ жИЖЈЪТМўжЎМфЕФМфИє
adb shell monkey --throttle < milliseconds >
adb shell monkey -p package --throttle 1000 10
2.seedВЮЪ§ жИЖЈЫцЛњЩњГЩЪїЕФseedжЕ
adb shell monkey -s < seed> < event-count>
adb shell monkey -p package -s 100 50
3.ДЅУўЪТМў
ЩшЖЈДЅУўЪТМўАйЗжБШ
adb shell monkey --pct-touch < percent>
adb shell monkey -p package --pct-touch 100 100
adb shell monkey -v -p package --pct-touch 100 100
4.ЖЏзїЪТМў
ЩшЖЈЖЏзїЪТМўАйЗжБШ
adb shell monkey --pct-motion < percent>
adb shell monkey -v -p package --pct-motion 100 100
5,ЙьМЃЧђЪТМў
ЩшЖЈЙьМЃЧђЪТМўАйЗжБШ
adb shell monkey --pct-trackball < percent>
6,ЛљБОЕМКНЪТМў
ЩшЖЈЛљБОЕМКНЪТМўАйЗжБШЃЌЪфШыЩшБИЕФЩЯЃЌЯТЃЌзѓЃЌгв
adb shell monkey --pct-nav < percent>
7,жївЊЕМКНЪТМў
ЩшЖЈжївЊЕМКНЪТМўАйЗжБШЃЌМцШнжаМфМќЃЌЗЕЛиМќЃЌВЫЕЅМќ
adb shell monkey --pct-majornav < percent>
8,ЯЕЭГЕМКНЪТМў
ЩшЖЈЯЕЭГЕМКНЪТМўАйЗжБШЃЌHOME,BACK,ВІКХМАвєСПМќ
adb shell monkey --pct-syskeys < percent>
9,ЦєЖЏActivityЪТМў
ЩшЖЈЦєЖЏActivityЕФЪТМўАйЗжБШ
adb shell monkey --pct-appswitch < percent>
10,ВЛГЃгУЪТМў
ЩшЖЈВЛГЃгУЪТМўЕФАйЗжБШ
adb shell monkey --pct-anyevent < percent>
11,БРРЃЪТМў
КіТдБРРЃКЭвьГЃ МЬајдЫаа
adb shell monkey --ignore-crashes < event-count>
12ЃЌГЌЪБЪТМў
КіТдГЌЪБЪТМў
adb shell monkey --ignore-timeouts < event-count>
adb shell monkey -v -p package --ignore-carshes --ignore-timeouts
100
Monkey ScriptГЃгУУќСюНщЩм
жДааMonkeyНХБОЕФУќСюЃК
adb shell monkey -f < scriptfile> < event-count>
scriptfile ЪЧИіНХБОЮФМў
1ЃЌDispatchTrackball УќСю

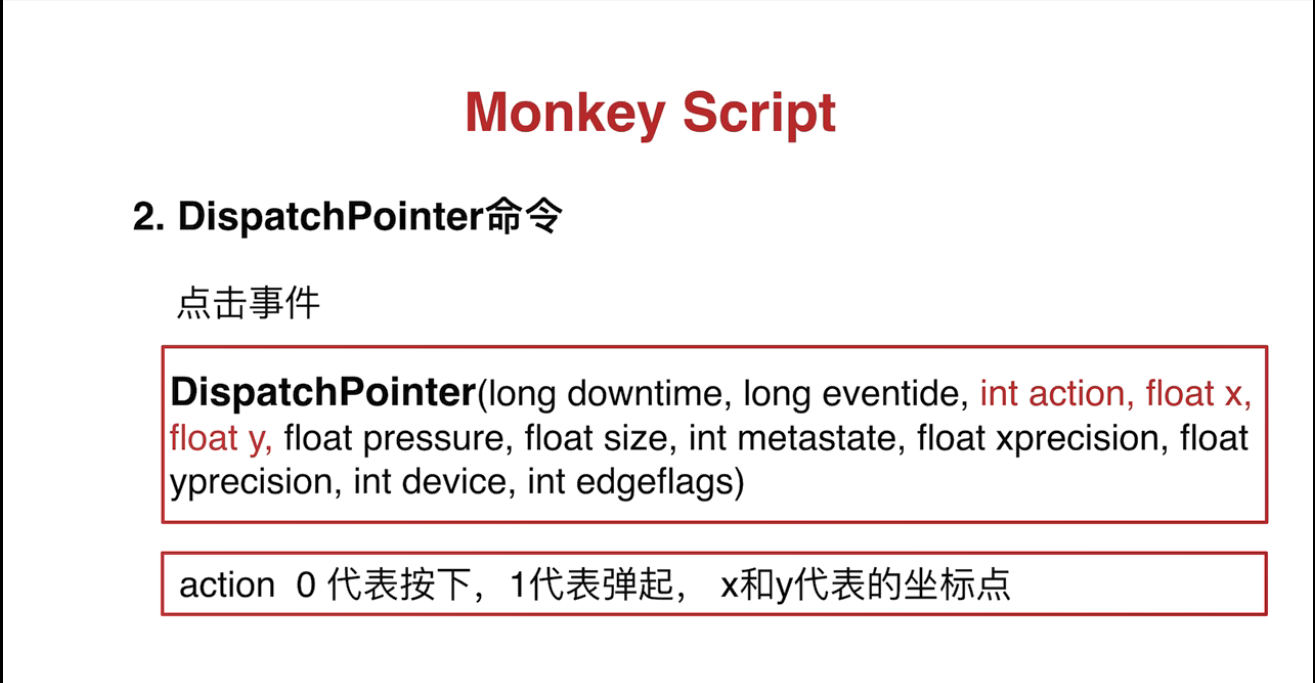
2,DispatchPointerУќСю
3ЃЌDispatchString УќСю 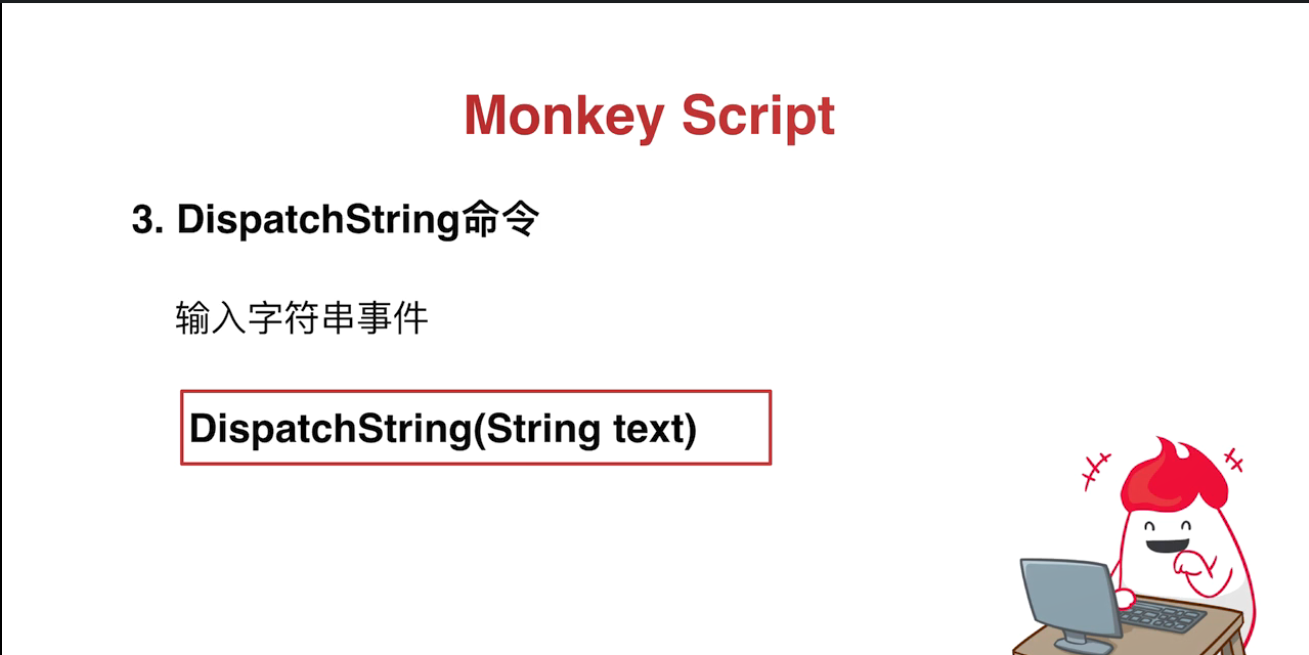
4ЃЌLaunchActivity УќСю 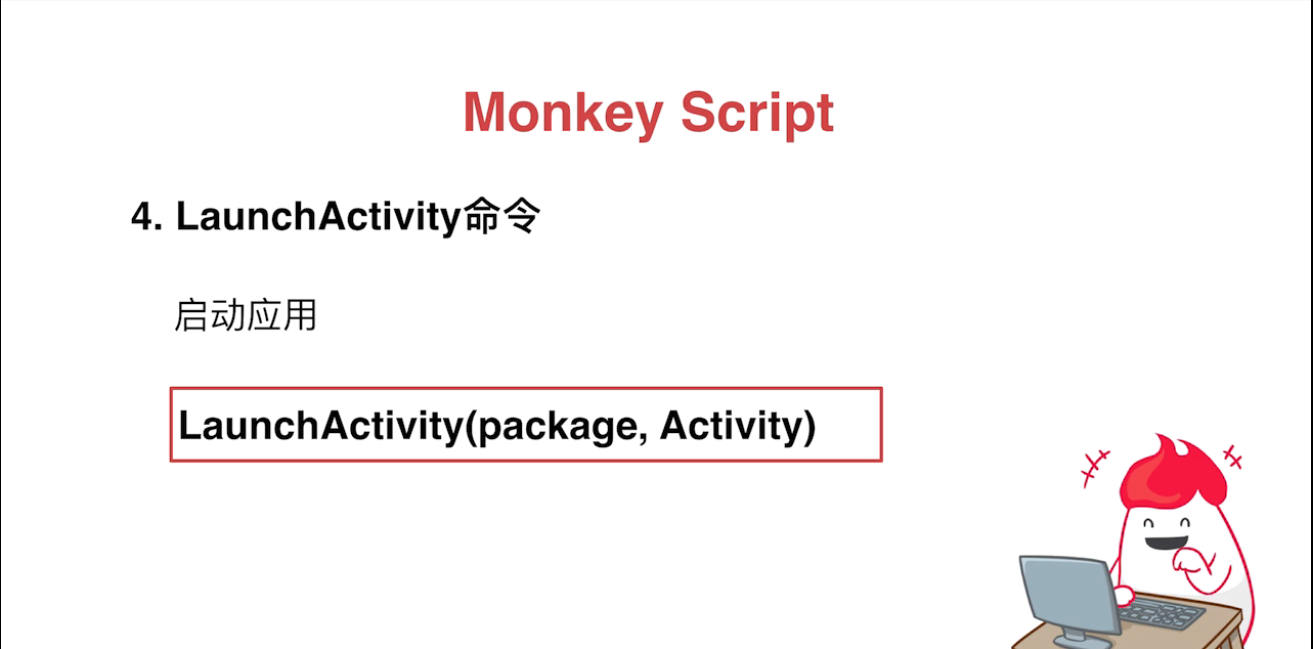
5ЃЌUserWaitУќСю 
6ЃЌDispatchPress УќСю 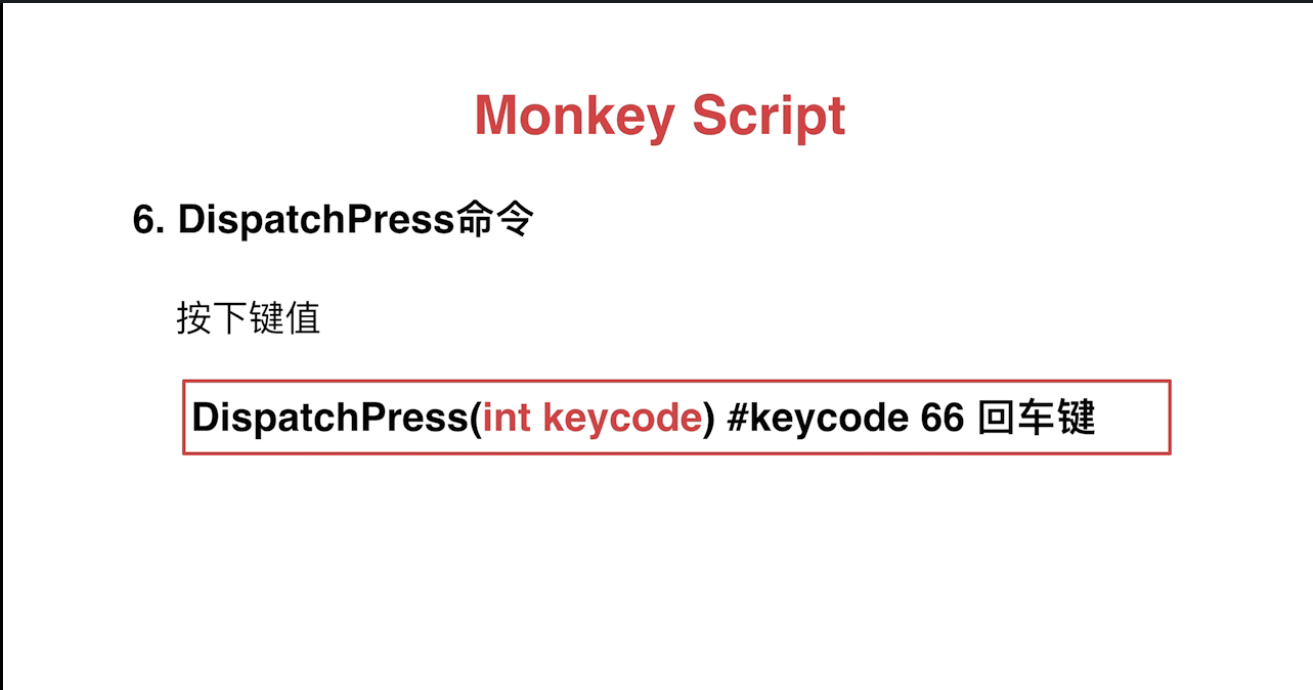
MonkeyScriptЪЕеН
MonkeyScriptНХБОЕФБраД 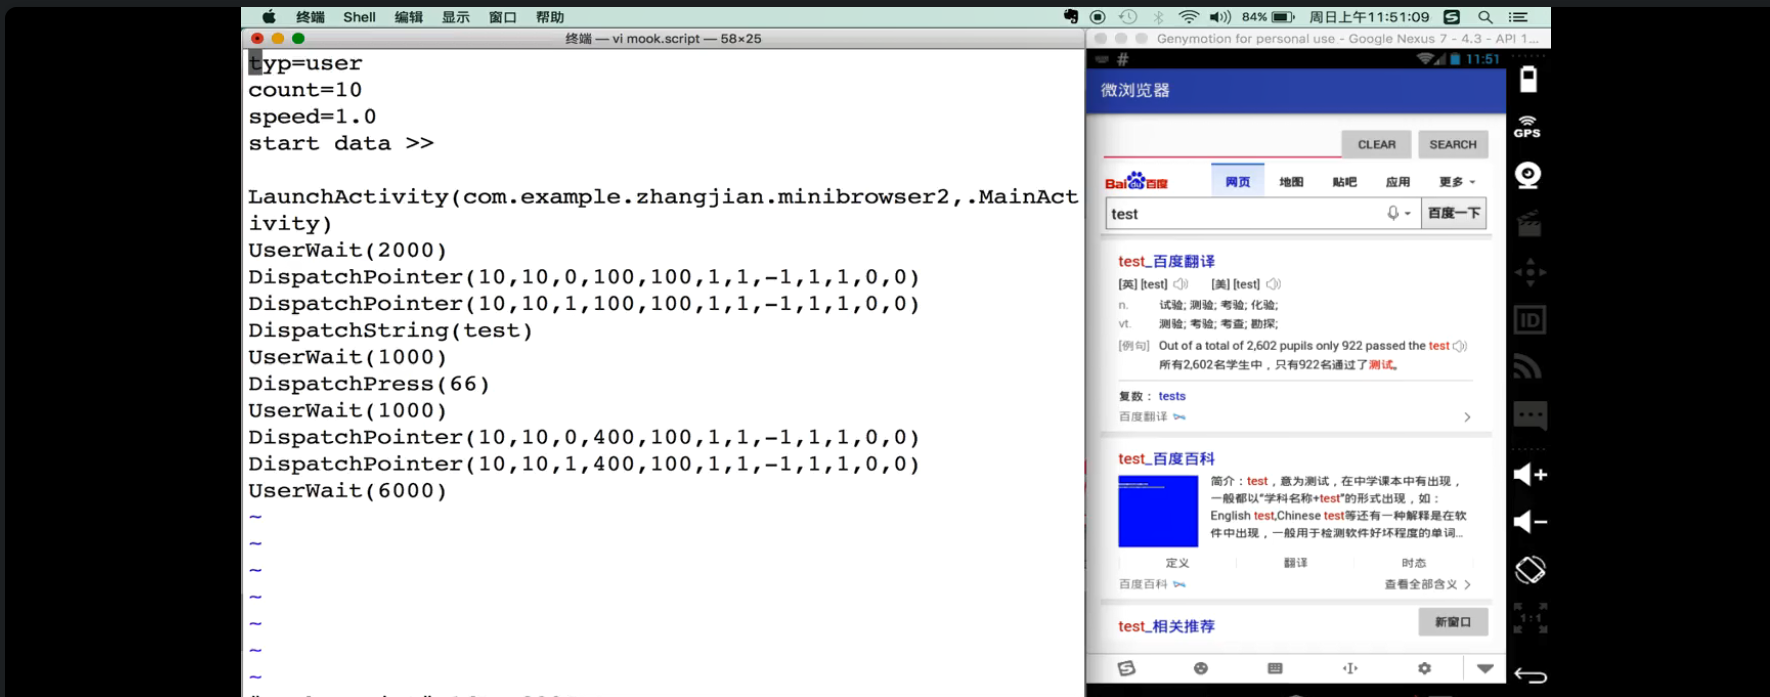
ЭЈЙ§android-sdk ЯТУцЕФuiautomatorviewer жаЛёШЁзјБъЕу
adb push НХБОЮФМў /data/local/tmp/ НХБОИДжЦЕНЪжЛњРяУцУќСю
monkey -f НХБОУћ ДЮЪ§ дкЪжЛњжажДааНХБО
БШШчЮвАбНХБОЮФМўЕМШыЪжЛњРяЕФУќСю
adb push C:\Users\Administrator\Desktop\mook.script
/data/local/tmp/
жДааНХБОЕФУќСю
adb shell monkey -f /data/local/tmp/mook.script 2
НХБОЮФМўФкШн
type=user
count=10
speed=1.0
start data >>
LaunchActivity (com.test.demo,com.test.demo.MainActivity)
UserWait(2000)
DispatchPointer (10,10,0,100,50,1,1,-1,1,1,0,0)
DispatchPointer (10,10,1,100,50,1,1,-1,1,1,0,0)
DispatchString(test)
UserWait(1000)
DispatchPress(66)
UserWait(1000)
DispatchPointer (10,10,0,400,150,1,1,-1,1,1,0,0)
DispatchPointer (10,10,1,400,150,1,1,-1,1,1,0,0)
UserWait(6000) |
Monkey ScriptГЃгУУќСюНщЩм 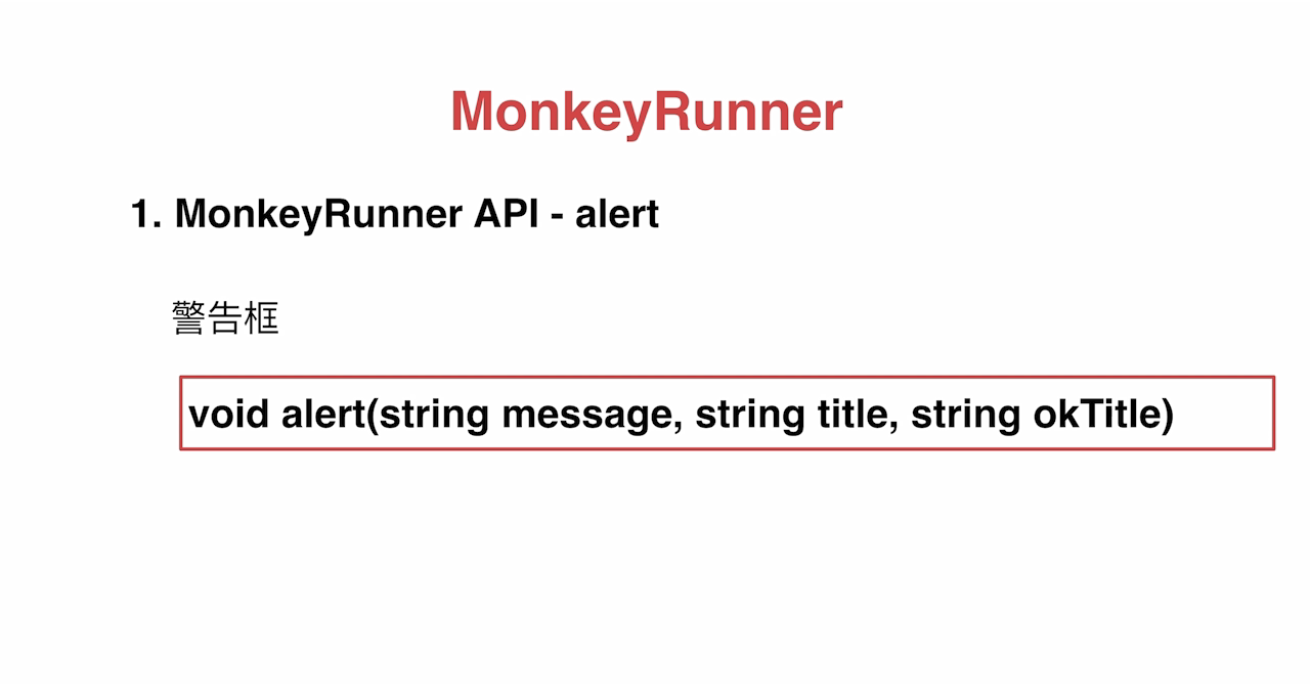
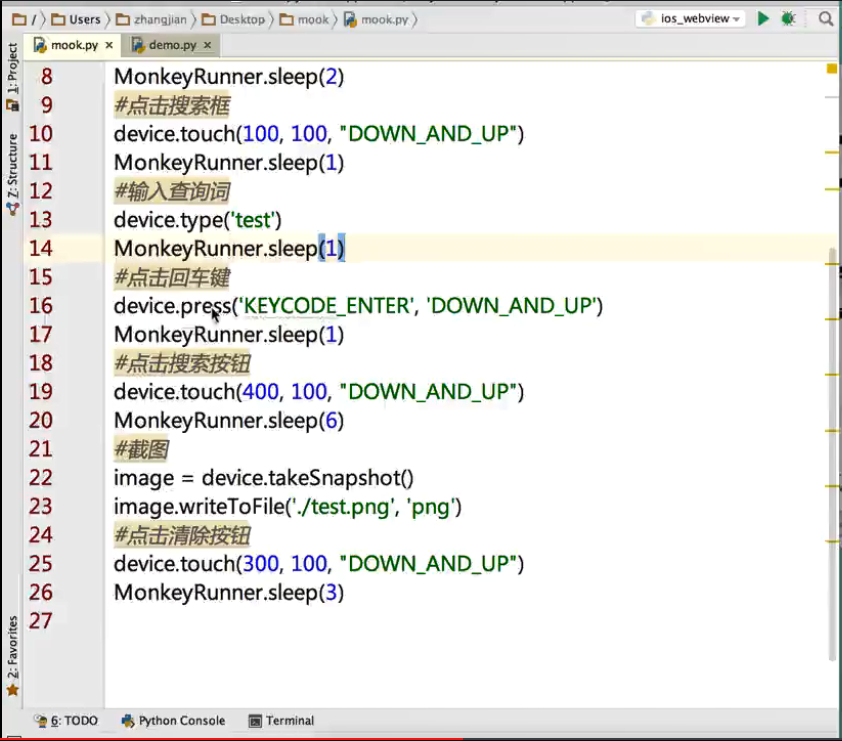
monkeyrunner demo.py
#!/usr/bin/python
#-*- UTF-8 -*-
from com.android.monkeyrunner import MonkeyRunner
MonkeyRunner.alert ('Hello mook friends','This
is title','Ok') |
monkeyrunnerБраДЕФНХБОНиЭМ 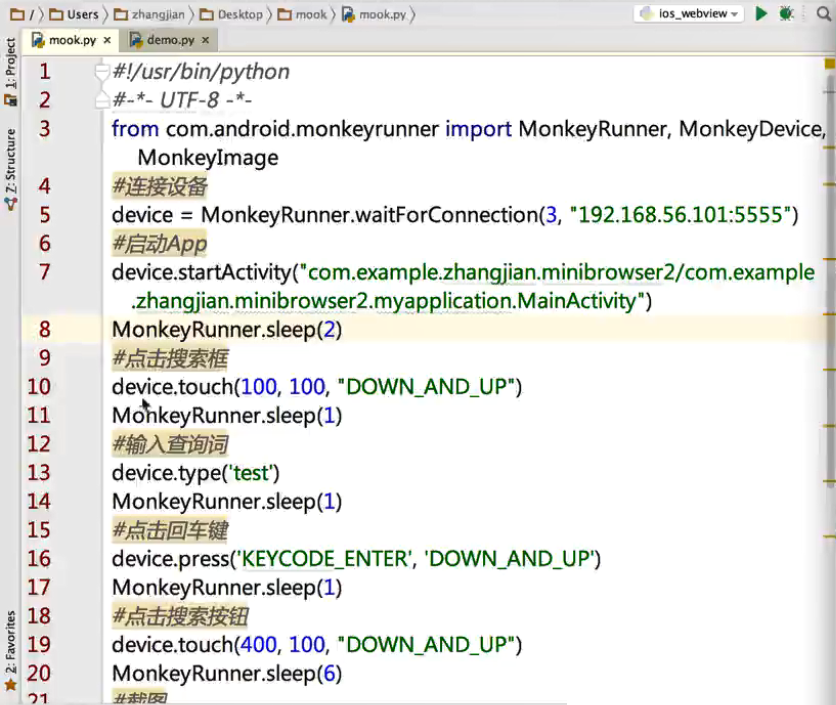
|