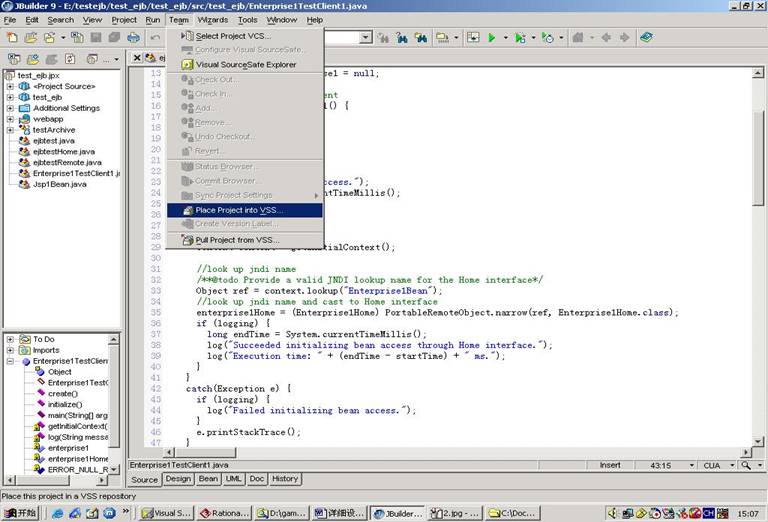
| 导入工程 使用过程如下: 当小组中某个人建立好工程后,要将工程放入sourceSafe,如下图所示 第一步:选择菜单中“Team”---“Select Project VCS”ASPectratio="t" v:ext="edit"> 第二步:出来对话框后选择“Visual Source Safe” 第三步:选择菜单“Team”-----Place Project into VSS”
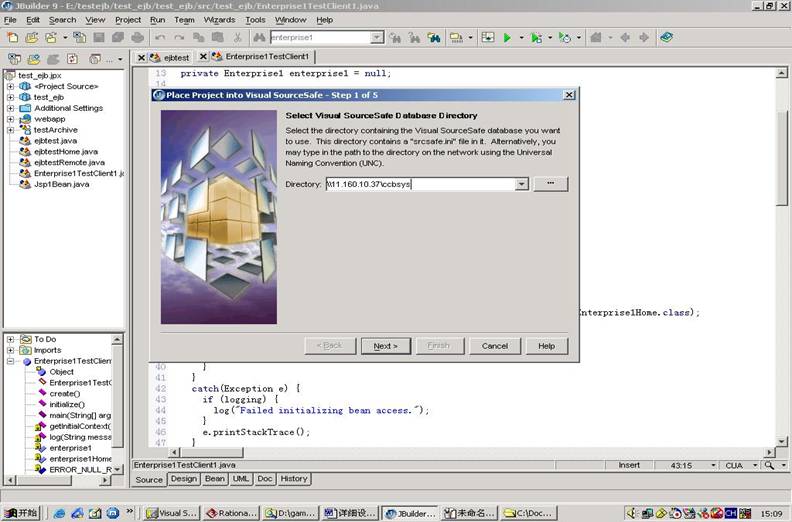
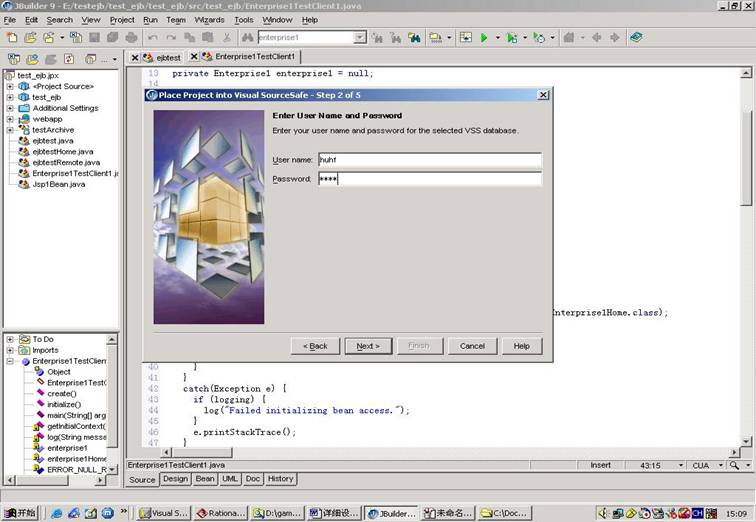
第四步:输入SourceSafe所在的路径 第五步:输入在source中的用户名密码
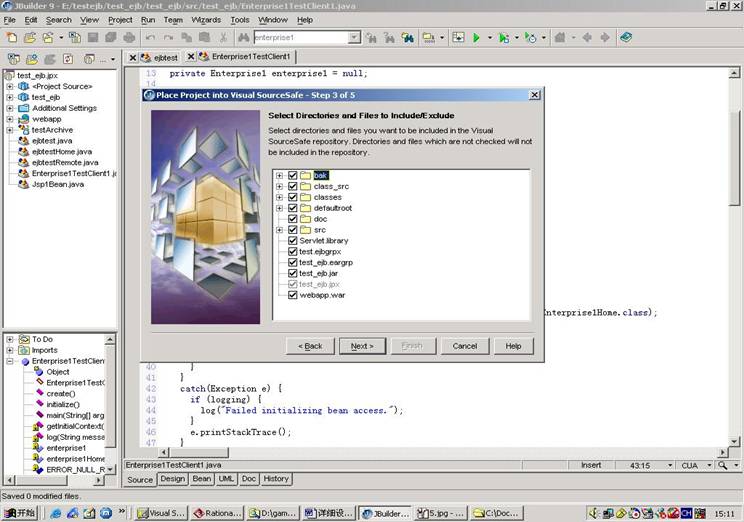
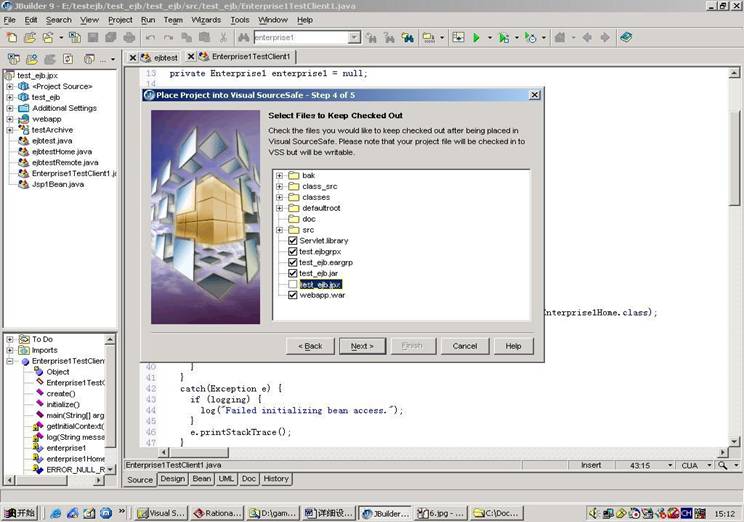
第六步:选上要放入sourcesafe的文件
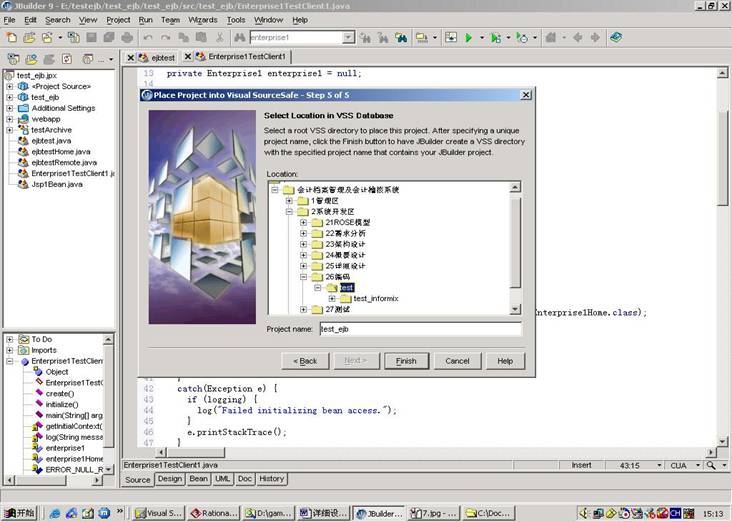
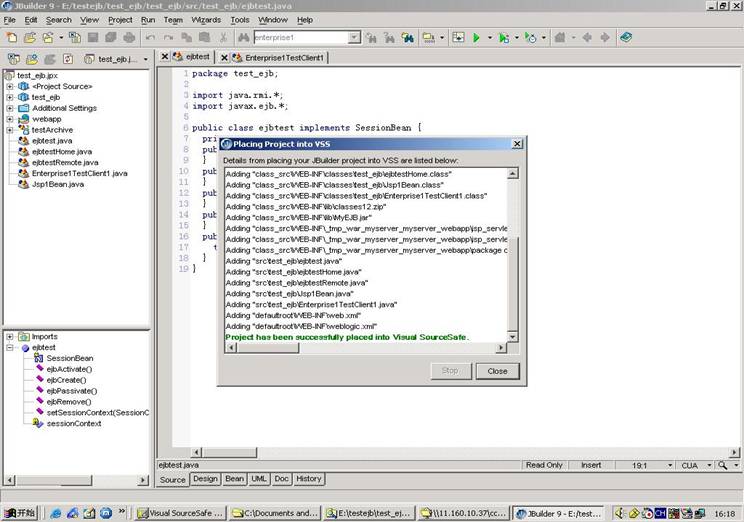
第七步:选上要将其置为“check out”状态的文件 第八步:选择要将工程放入sourcesafe中的什么位置 第九步:选择完成,可是到导入,成功后如下图所示。
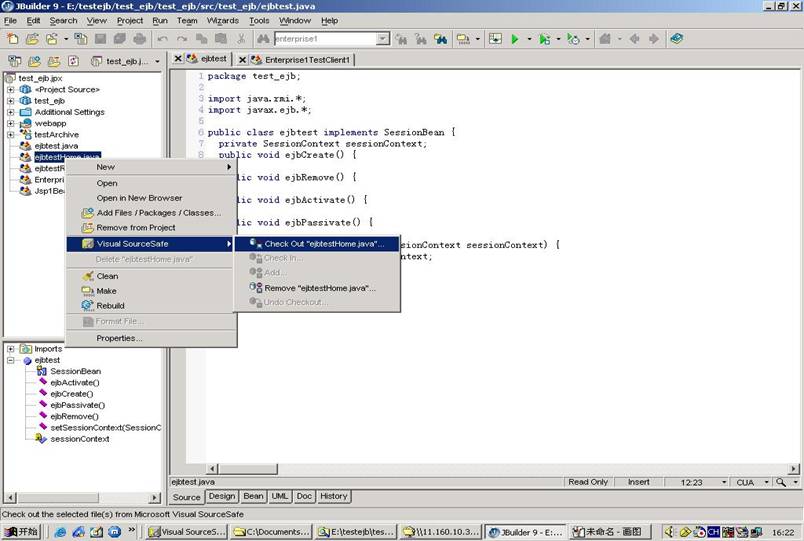
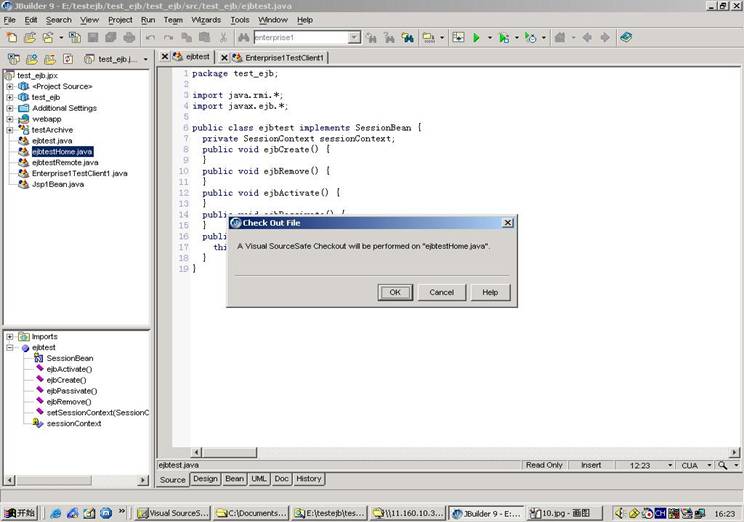
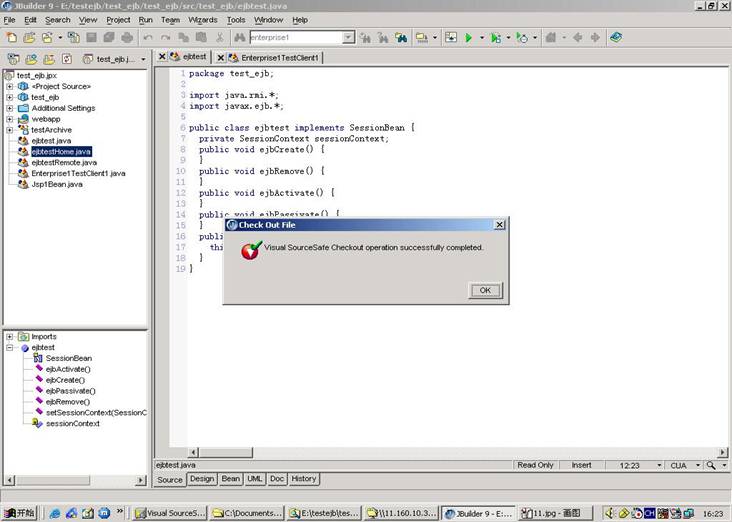
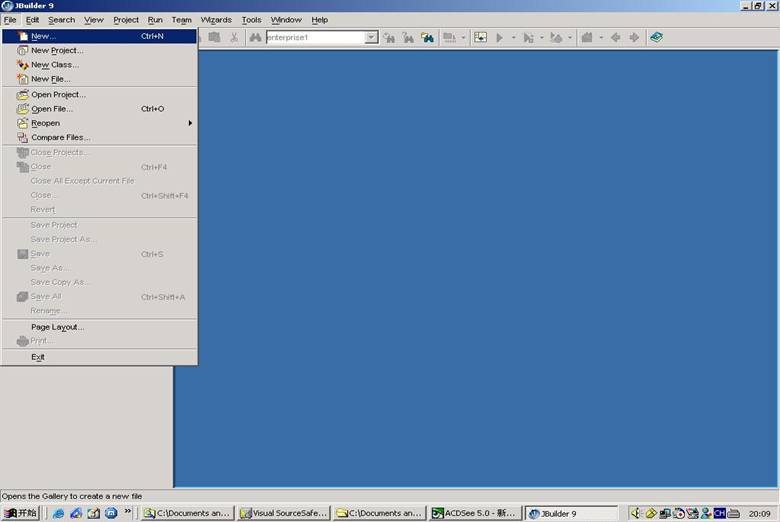
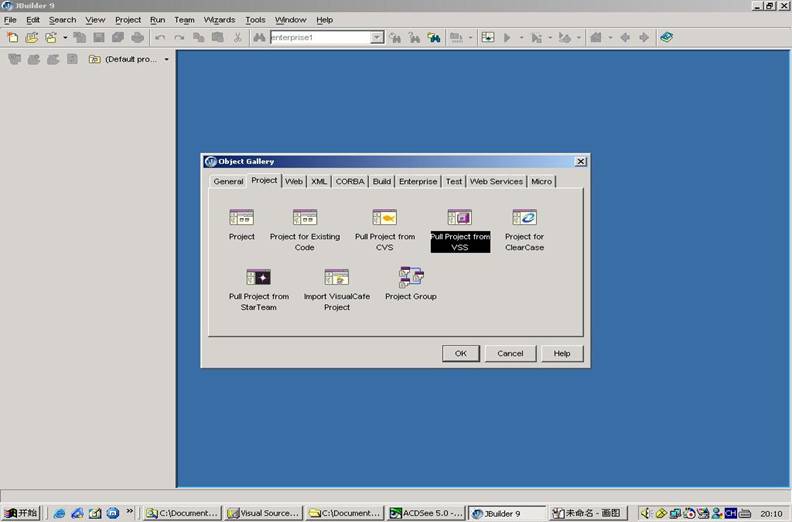
操作 1、check out 在要进行check out 的文件上点击右键,选择“check out xxxxx.xxxx” 出来提示框,选“ok” 成功check out 2、undo check out、remove 、check in都与上面的操作类似。 如果不愿意每次操作成功后出现提示,将Tools----IDE Options中的browser中的选项选上。 需要说明的是,如果要在source safe 中删除该文件,选择“remove”,如果是要在本地机上和source safe中都删掉该文件,要先check out,再remove,再delete。 加载工程 从source safe上将工程加载进来,过程如下: 第一步:选择file----new< 第二步:在“project”中选择“pull project from VSS ”
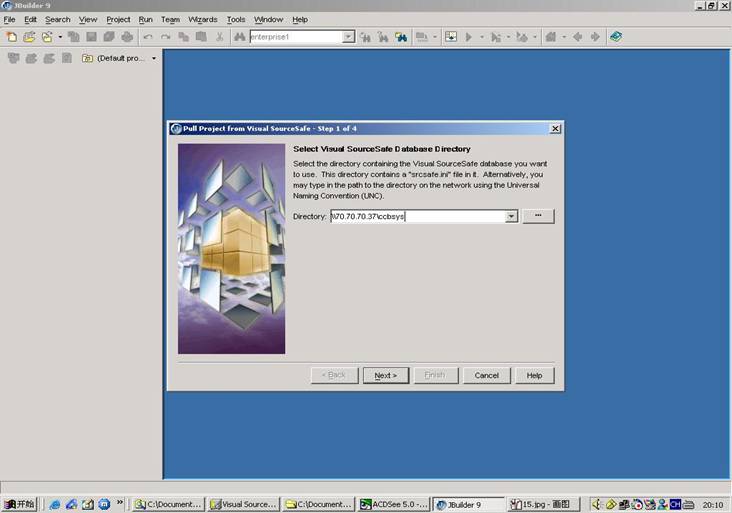
第三步:选择source safe 路径
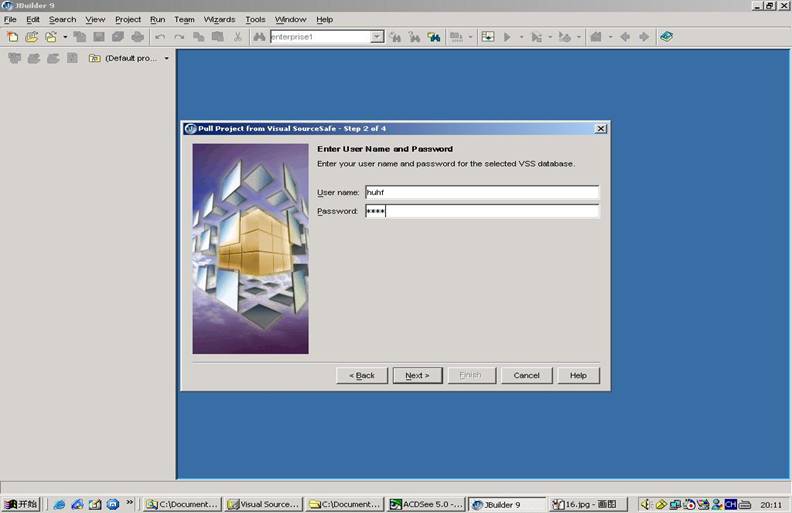
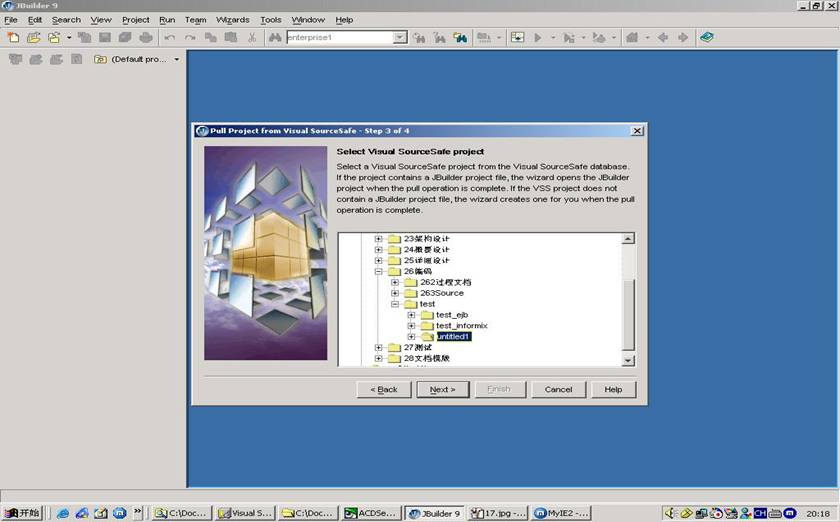
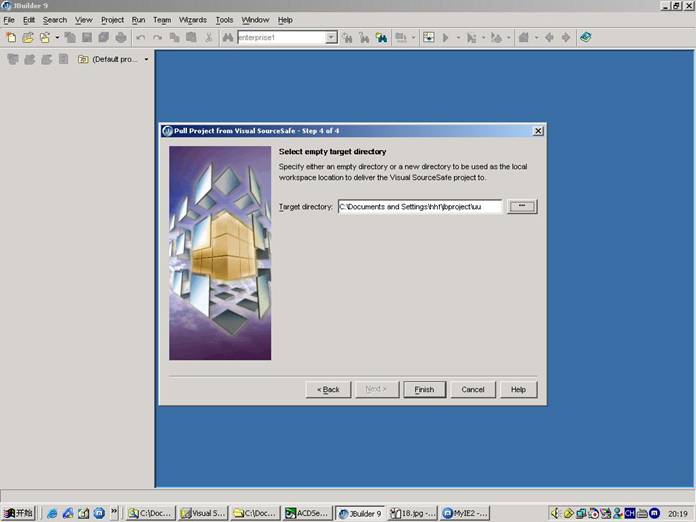
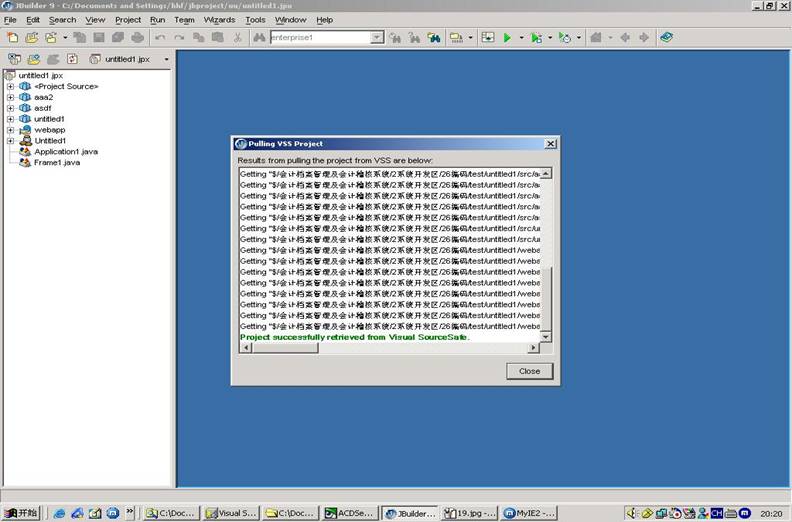
第四步:输入source safe的用户名密码< 第五步:选择要进行下载的工程目录 第六步:选择本地要存放工程的本地目录,该目录必须为空。 第七步:加载完成。 其他 JBuilder9中的vss基本可以完成该有的功能,但是也有缺点:一次只能对单个文件进行check out 、check in操作而不能对多个文件进行操作。 如果小组中的一个成员在工程中加入一个文件,另外的成员会看不到该文件。 解决的办法是,将source safe中的src目录的set working folder设置为本地工程的src目录,每次在打开之前,先用source safe将该目录下的最新版本取到本地。这样用JBuilder打开工程后就可以看到其他成员提交的文件。 |