|
一. Git介绍
1.分布式 : Git版本控制系统是一个分布式的系统, 是用来保存工程源代码历史状态的命令行工具;
2.保存点 : Git的保存点可以追踪源码中的文件, 并能得到某一个时间点上的整个工程项目额状态;
可以在该保存点将多人提交的源码合并, 也可以会退到某一个保存点上;
3.Git离线操作性 :Git可以离线进行代码提交, 因此它称得上是完全的分布式处理,
Git所有的操作不需要在线进行; 这意味着Git的速度要比SVN等工具快得多, 因为SVN等工具需要在线时才能操作,
如果网络环境不好, 提交代码会变得非常缓慢;
4.Git基于快照 : SVN等老式版本控制工具是将提交点保存成补丁文件,
Git提交是将提交点指向提交时的项目快照, 提交的东西包含一些元数据(作者, 日期, GPG等);
5.Git的分支和合并 : 分支模型是Git最显著的特点, 因为这改变了开发者的开发模式,
SVN等版本控制工具将每个分支都要放在不同的目录中, Git可以在同一个目录中切换不同的分支;
6.分支即时性 : 创建和切换分支几乎是同时进行的, 用户可以上传一部分分支,
另外一部分分支可以隐藏在本地, 不必将所有的分支都上传到GitHub中去;
7.分支灵活性 : 用户可以随时 创建 合并 删除分支, 多人实现不同的功能,
可以创建多个分支进行开发, 之后进行分支合并, 这种方式使开发变得快速, 简单, 安全;
二. Git通用客户端(msysgit)
1. 下载Git客户端
Git客户端下载地址 :https://code.google.com/p/msysgit/downloads/list
将地址复制到浏览器栏即可下载.
2. 安装Git客户端
欢迎界面 : 直接下一步;
协议 : 必须接受;
安装位置 : 预留100M空间, 自定义安装位置;

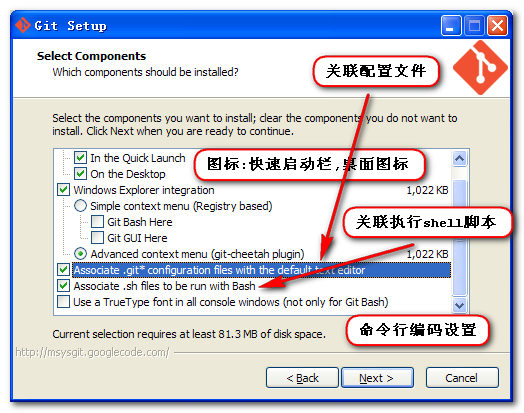
选择安装组件 :也可以默认选择;
-- 图标组件(Addition icons) : 选择是否创建快速启动栏图标
或者 是否创建桌面快捷方式;
-- 桌面浏览(Windows Explorer integration)
: 浏览源码的方法, 单独的上下文浏览 只使用bash 或者 只用Git GUI工具; 高级的上下文浏览方法
使用git-cheetah plugin插件;
-- 关联配置文件 : 是否关联git配置文件, 该配置文件主要显示文本编辑器的样式;
-- 关联shell脚本文件 : 是否关联Bash命令行执行的脚本文件;
-- 使用TrueType编码 : 在命令行中是否使用TruthType编码,
该编码是微软和苹果公司制定的通用编码;
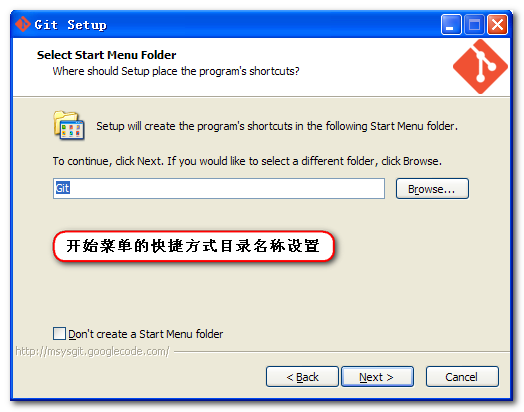
开始菜单快捷方式目录 : 设置开始菜单中快捷方式的目录名称, 也可以选择不再开始菜单中创建快捷方式;
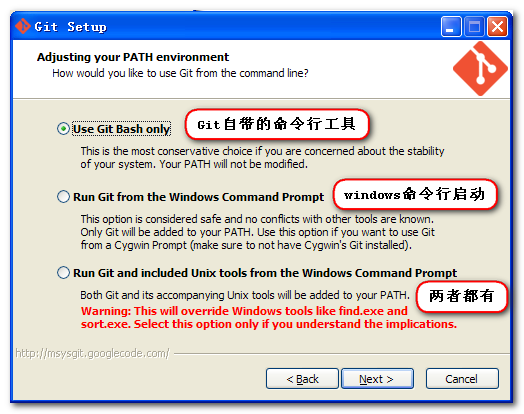
设置环境变量 : 选择使用什么样的命令行工具, 一般情况下我们默认使用Git
Bash即可, 默认选择;
-- Git自带 : 使用Git自带的Git Bash命令行工具;
-- 系统自带CMD : 使用Windows系统的命令行工具;
-- 二者都有 : 上面二者同时配置, 但是注意, 这样会将windows中的find.exe
和 sort.exe工具覆盖, 如果不懂这些尽量不要选择;
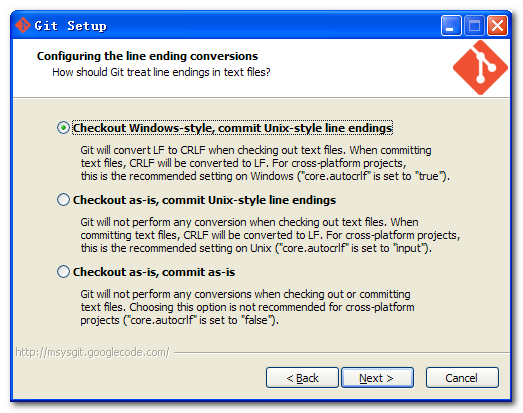
选择换行格式 :
-- 检查出windows格式转换为unix格式 : 将windows格式的换行转为unix格式的换行在进行提交;
-- 检查出原来格式转为unix格式 : 不管什么格式的, 一律转为unix格式的换行在进行提交;
-- 不进行格式转换 : 不进行转换, 检查出什么, 就提交什么;
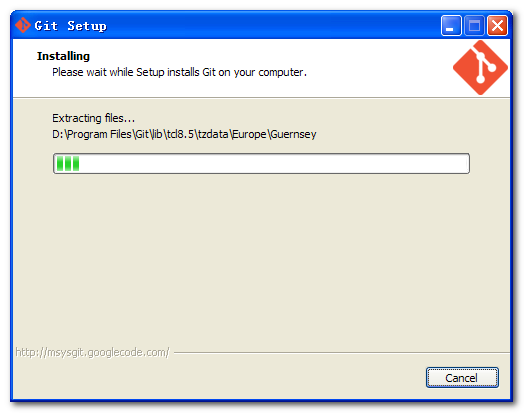
开始安装 :
安装结束 : over;
3. 配置GitHub
修改Git Bash的配置 : 将Git Bash设置为快速编辑模式,
可以更好的使用该命令行工具 :

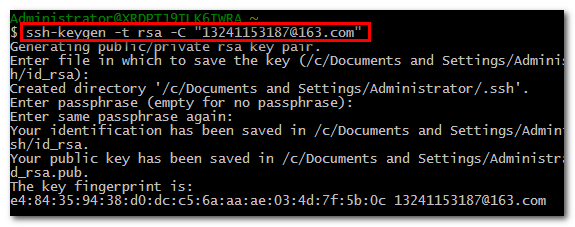
(1) 创建本地ssh
使用命令 : 创建本地ssh
ssh-keygen -t rsa -C "13241153187@163.com" |
GitHub邮箱 : 该命令后面的邮箱就是GitHub的注册邮箱
路径选择 : 使用该命令之后, 会出现提示选择ssh-key生成路径,
这里直接点回车默认即可, 生成的ssh-key在默认路径中;
密码确认 : 这里我们不使用密码进行登录, 用密码太麻烦;
(2) 将ssh配置到GitHub中
进入生成的ssh目录 : C:\Documents and Settings\Administrator\.ssh
中, 使用记事本打开 id_rsa.pub 文件, 将该文件中的内容复制;
id_rsa.pub 文件内容 :
ssh-
rsa AAAAB3NzaC1yc2EAAAABIwAAAQEAtT1YCeaNulpfC+
ARqAWrCdfpi6CpW3gkGT0hp6Q8by7NnEfy4dah9CwSrNbWJH5eS4tiqckE+
bdbSVNvAboFD1MtGZjtzE4GDweG/6J/SDYV/ADFN/RLWGb+5rQ8wMCjc/fODgLJDFxk1Fwk/
/TTqTcbtLab1toLcts3zGIW5DstA3RQ0CCX/sPew5m7vh7DcKXluj2TBd9hw== 13241153187@163.com |
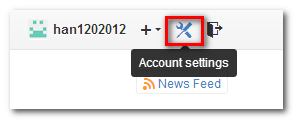
进入GitHub网站 : 登录GitHub, 选择Account Setting
用户设置 :
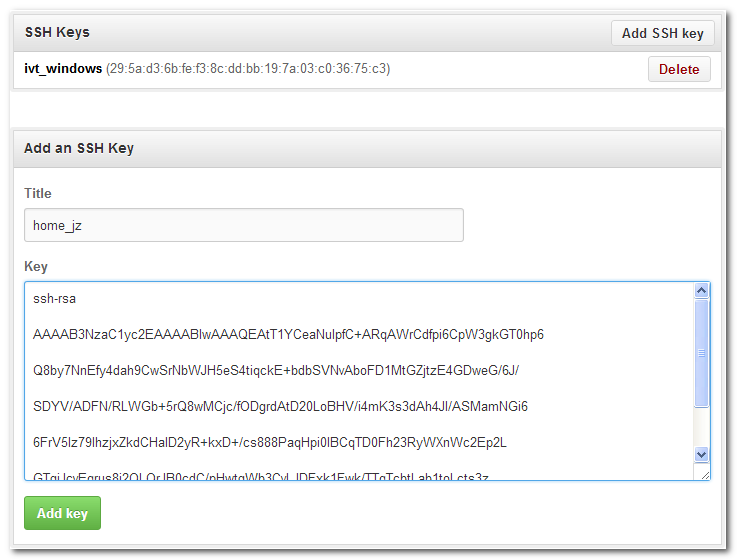
选择左侧的SSH-KEY选项 :

点击右侧的Add SSH key :

将上面复制好的ssh-key复制进去 :
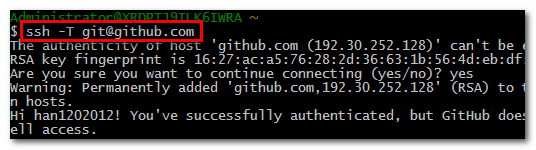
验证是否配置成功 :
使用命令 :
成功提示 : 如果出现Hi han1202012! You've successfully
authenticated, but GitHub does not provide shell access.
就说明配置成功, 可以连接上GitHub;
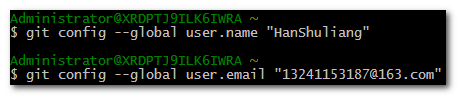
(3) 配置本地用户和邮箱
用户名邮箱作用 : 我们需要设置一个用户名 和 邮箱, 这是用来上传本地仓库到GitHub中, 在GitHub中显示代码上传者;
使用命令 :
git config --global user.name "HanShuliang" //设置用户名
git config --global user.email "13241153187@163.com" //设置邮箱 |
4. Git Bash提交源码到GitHub
(1) GitHub中创建一个工程
工程的https地址: https://github.com/han1202012/TabHost_Test.git
.
工程的SSH地址 : git@github.com:han1202012/TabHost_Test.git
.
GitHub提示生成的命令 :
-- Create a new repository on the command
line :
touch README.md
git init
git add README.md
git commit -m "first commit"
git remote add origin git@github.com:han1202012/TabHost_Test.git
git push -u origin master |
-- Push an existing repository from
the command line :
git remote add origin git@github.com:han1202012/TabHost_Test.git
git push -u origin master |
(2) 初始化git目录
使用命令 :
如果不执行这条命令, 就会出现错误 : fatal: Not a git repository (or
any of the parent directories): .git .
(3) 添加文件
使用命令 :
可能会报出一些警告, 不用理会 :
warning: LF will be replaced by CRLF in AndroidManifest.xml.
The file will have its original line endings in your working directory.
warning: LF will be replaced by CRLF in bin/AndroidManifest.xml.
The file will have its original line endings in your working directory.
warning: LF will be replaced by CRLF in gen/shuliang/han/tabhost_test/BuildConfig.java. |
将仓库中的所有文件添加到缓存中;
(4) 提交缓存
使用命令 :
git remote add origin git@github.com:han1202012/TabHost_Test.git |
将添加或者改变的内容提交到缓存中;
(5) 将Git本地缓存提交到GitHub中
使用命令 :
git push -u origin master |
执行该命令, 源码就被提交到了GitHub 中;
|


