H2是一个开源的嵌入式数据库引擎,采用java语言编写,不受平台的限制,同时H2提供了一个十分方便的web控制台用于操作和管理数据库内容。H2还提供兼容模式,可以兼容一些主流的数据库,因此采用H2作为开发期的数据库非常方便。
一、引入Maven依赖
在maven中定义H2数据库的版本属性
<properties>
        <h2.version>1.3.172</h2.version>
    </properties>ataNode对象
} |
添加H2依赖
 <dependency>
        <groupId>com.h2database</groupId>
        <artifactId>h2</artifactId>
        <version>${h2.version}</version>
        <scope>test</scope>
</dependency> |
二、运行方式
1、在内存中运行
数据库只在内存中运行,关闭连接后数据库将被清空,适合测试环境
连接字符串:
jdbc:h2:mem:DBName;DB_CLOSE_DELAY=-1 |
如果不指定DBName,则以私有方式启动,只允许一个连接
2、嵌入式
数据库持久化存储为单个文件
连接字符串:
jdbc:h2:file:~/.h2/DBName;AUTO_SERVER=TRUE |
~/.h2/DBName表示数据库文件的存储位置,如果第一次连接则会自动创建数据库
3、服务模式
H2支持三种服务模式:
1.web server:此种运行方式支持使用浏览器访问H2 Console
2.TCP server:支持客户端/服务器端的连接方式
3.PG server:支持PostgreSQL客户端
启动tcp服务连接字符串示例:
jdbc:h2:tcp://localhost/~/test 使用用户主目录
jdbc:h2:tcp://localhost//data/test 使用绝对路径
4、连接字符串参数
1.DB_CLOSE_DELAY:要求最后一个正在连接的连接断开后,不要关闭数据库
2.MODE=MySQL:兼容模式,H2兼容多种数据库,该值可以为:DB2、Derby、HSQLDB、MSSQLServer、MySQL、Oracle、PostgreSQL
3.AUTO_RECONNECT=TRUE:连接丢失后自动重新连接
4.AUTO_SERVER=TRUE:启动自动混合模式,允许开启多个连接,该参数不支持在内存中运行模式
5.TRACE_LEVEL_SYSTEM_OUT、TRACE_LEVEL_FILE:输出跟踪日志到控制台或文件,
取值0为OFF,1为ERROR(默认值),2为INFO,3为DEBUG
6.SET TRACE_MAX_FILE_SIZE mb:设置跟踪日志文件的大小,默认为16M
5、启动服务模式,打开H2 Console web页面
启动服务,在命令行中执行
java -cp h2*.jar org.h2.tools.Server |
执行如下命令,获取选项列表及默认值
java -cp h2*.jar org.h2.tools.Server -? |
常见的选项如下:
-web:启动支持H2 Console的服务
-webPort <port>:服务启动端口,默认为8082
-browser:启动H2 Console web管理页面
-tcp:使用TCP server模式启动
-pg:使用PG server模式启动
此外,使用maven也可以启动H2服务
<?xml version="1.0" encoding="UTF-8"?>
    <project xmlns="http://maven.apache.org/POM/4.0.0" xmlns:xsi="http://www.w3.org/2001/XMLSchema-instance"
        xsi:schemaLocation="http://maven.apache.org/POM/4.0.0 http://maven.apache.org/xsd/maven-4.0.0.xsd">
        <modelVersion>1.0.0</modelVersion>
        <version>1.0.0</version>
        <groupId>groupid</groupId>
        <artifactId>h2-console</artifactId>
        <name>H2 Console</name>
        <packaging>pom</packaging>

        <properties>
            <h2.version>1.3.172</h2.version>
        </properties>

        <dependencies>
            <dependency>
                <groupId>com.h2database</groupId>
                <artifactId>h2</artifactId>
                <version>${h2.version}</version>
                <scope>runtime</scope>
            </dependency>
        </dependencies>

        <build>
            <plugins>
                <plugin>
                    <groupId>org.codehaus.mojo</groupId>
                    <artifactId>exec-maven-plugin</artifactId>
                    <executions>
                        <execution>
                            <goals>
                                <goal>java</goal>
                                </goals>
                        </execution>
                    </executions>
                    <configuration>
                        <mainClass>org.h2.tools.Server</mainClass>
                        <arguments>
                            <argument>-web</argument>
                            <argument>-webPort</argument>
                            <argument>8090</argument>
                            <argument>-browser</argument>
                        </arguments>
                    </configuration>
                </plugin>
            </plugins>
        </build>
</project> |
在命令行中执行如下命令启动H2 Console
或者建立一个bat文件
@echo off
call mvn exec:java
pause |
此操作相当于执行了如下命令:
java -jar h2-1.3.168.jar -web -webPort 8090 -browser |
三、应用程序配置
1、Properties配置
java应用程序关于数据库的Properties配置文件示例如下:
#h2 database settings
jdbc.driver=org.h2.Driver
jdbc.url=jdbc:h2:file:~/.h2/quickstart;AUTO_SERVER=TRUE;DB_CLOSE_DELAY=-1
jdbc.username=sa
jdbc.password=
#connection pool settings
jdbc.pool.maxIdle=5
jdbc.pool.maxActive=40 |
2、初始化数据库
(1)、在Maven中初始化数据库
可以创建一个Profile,专门用于初始化数据库。在maven中可以通过maven-antrun-plugin执行ant任务,在ant任务中使用sql标签可以执行sql脚本文件,配置示例如下:
<profile>
        <id>refresh-db</id>
        <build>
            <plugins>
                <plugin>
                    <groupId>org.apache.maven.plugins</groupId>
                    <artifactId>maven-antrun-plugin</artifactId>
                    <configuration>
                        <target>
                            <property file="src/main/resources/application.properties" />
                            <sql driver="${jdbc.driver}" url="${jdbc.url}" userid="${jdbc.username}"
password="${jdbc.password}" onerror="continue" encoding="${project.build.sourceEncoding}">
                                <classpath refid="maven.test.classpath" />
                                <transaction src="src/main/resources/sql/h2/schema.sql"/>
                                <transaction src="src/test/resources/data/h2/import-data.sql"/>
                            </sql>
                        </target>
                    </configuration>
                </plugin>
            </plugins>
        </build>
</profile> |
执行如下命令调用该Profile,初始化数据库
mvn antrun:run -Prefresh-db |
(2)、在Spring中初始化数据库
Spring Profile和maven profile一样,也可以模拟不同的开发环境。在Spirng中可以通过jdbc:initialize-database初始化数据库,配置示例如下
<beans profile="test">
        <context:property-placeholder ignore-resource-not-found="true"
            location="classpath*:/application.properties,
                      classpath*:/application.test.properties" />

        <!-- Spring Simple连接池 -->
        <bean id="dataSource" class="org.springframework.jdbc.datasource.SimpleDriverDataSource">
            <property name="driverClass" value="${jdbc.driver}" />
            <property name="url" value="${jdbc.url}" />
            <property name="username" value="${jdbc.username}" />
            <property name="password" value="${jdbc.password}" />
        </bean>

        <!-- 初始化数据表结构 -->
        <jdbc:initialize-database data-source="dataSource" ignore-failures="ALL">
            <jdbc:script location="classpath:sql/h2/schema.sql" />
            <jdbc:script location="classpath:data/h2/import-data.sql" encoding="UTF-8"/>
        </jdbc:initialize-database>
</beans> |
四、sql语法图
1、SELECT

2、INSERT

3、UPDATE

4、DELETE

5、BACKUP

6、EXPLAIN

7、MERGE

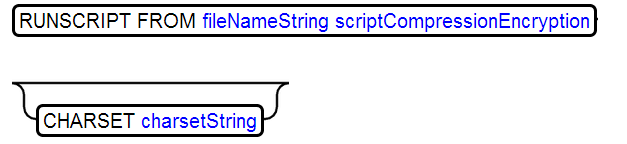
8、RUNSCRIPT
运行sql脚本文件
9、SCRIPT
根据数据库创建sql脚本

10、SHOW

11、ALTER INDEX RENAME

12、ALTER SCHEMA RENAME

13、ALTER SEQUENCE

14、ALTER TABLE
增加列

增加约束

修改列

删除列

删除序列

15、ALTER USER
修改用户名

修改用户密码

16、ALTER VIEW

17、COMMENT

18、CREATE CONSTANT

19、CREATE INDEX

20、CREATE ROLE

21、CREATE SCHEMA

22、CREATE SEQUENCE

23、CREATE TABLE

24、CREATE TRIGGER

25、CREATE USER

26、CREATE VIEW

27、DROP

28、GRANT RIGHT授权

给schema授权

复制角色的权限

29、REVOKE RIGHT移除授权

移除角色具有的权限

30、ROLLBACK
从某个还原点(savepoint)回滚

回滚事务

创建savepoint

|